This first installment has to do with ultrasound machine adjustments made easy There are several key factors in creating good, interpretable images. Patient prep, physics, physical mechanics (yours and the patient’s). And did I mention physics? But it is at times difficult to keep those factors in mind when your patient is, well, impatient; or your next appointment is here and waiting; or your staff is being pulled in many directions.
This first installment has to do with ultrasound machine adjustments made easy There are several key factors in creating good, interpretable images. Patient prep, physics, physical mechanics (yours and the patient’s). And did I mention physics? But it is at times difficult to keep those factors in mind when your patient is, well, impatient; or your next appointment is here and waiting; or your staff is being pulled in many directions.
Here is a guide to aid you in deciding which system control may be the best to adjust in certain scanning situations. In order of importance:
Frequency: The higher the better. If the ultrasound machine allows for frequency selection, try using the highest available for the probe, but still penetrating to the dorsal aspect of the target organ. Remember that the higher the frequency, the better the resolution but poorer penetration. This relates to the wavelength of the frequency.
- The actual controls may be named things like Res, Gen, Pen for resolution, general or penetration; Frequency; or system preset: small, medium, large.
- For example, if trying to look at only the kidney, then use a mid-range frequency such as 8MHz for a medium dog; 10 MHz for a cat. This of course will depend on the general size of the animal. Very fat animals require a little lower frequency as fat will disperse the incoming sound waves, losing energy and decreasing the energy of the returned echoes.
- For penetration to the liver for example, you may need to switch to a lower frequency to penetrate to the diaphragm.
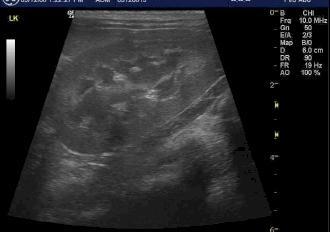
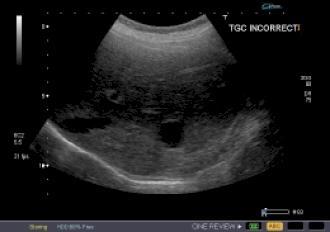
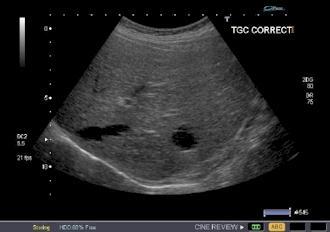
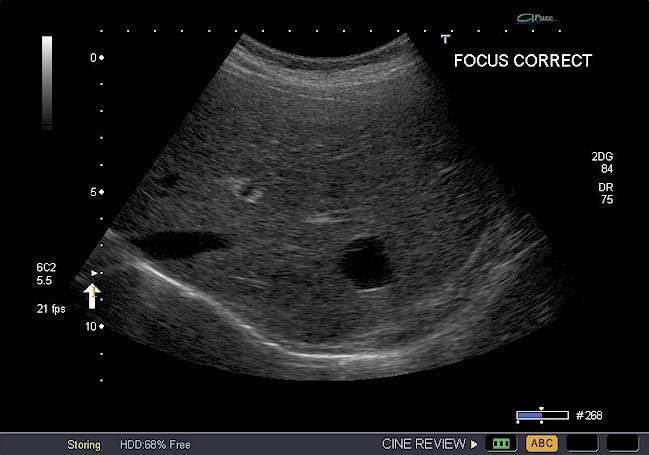
- You may find that detail in the image will dictate which frequency you use within the same organ. See Images to the right:
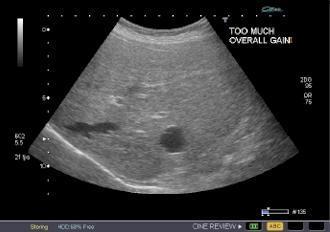
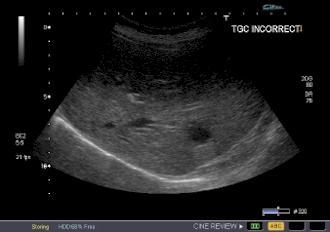
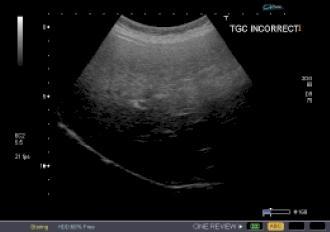
And so on. In most digital, modern ultrasound systems, the TGC curve is actually straight up and down.
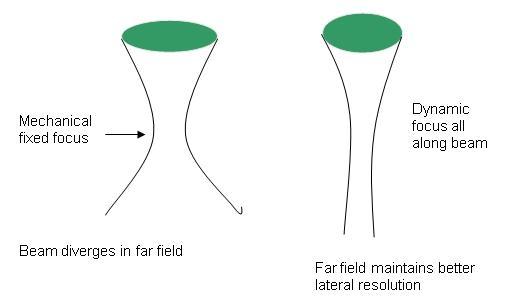
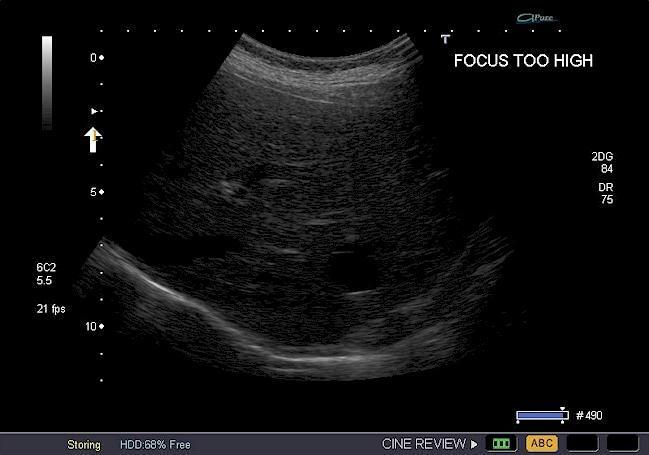
Next on the list of most common adjustments is the effect of focusing on the image quality.
Focusing can be achieved in a variety of ways and combinations of technologies. The most basic way of focusing the ultrasound beam is by means of a mechanical lens, the equivalent of a lens on a flashlight. The lens is part of the face of the transducer and cannot be altered. However, the WIDER the transducer face the wider the beam, but the better the ability to focus out in deeper depth.
Now that the system adjustments can be made to the 2D image, moving on to create solid, interpretable images should be easier. Remember it takes both a skilled operator and good equipment to generate quality images.
What about artifacts? Real or Imaginary?
Stay Tuned for the Next Installment!